Wednesday, 1 June 2016

GRILLED SWEET CORN+GARLIC AIOLI

Grilled corn is a great addition to any meal and due to its versatility, could be served as a salad or as a side dish or just as a tasty snack.  It is very low in calories, has no carbs, not much sugar or cholesterol and most importantly it tastes great.

I sometimes grill the cobs so I can add the kernels to a salad.  Their smoky flavour and different texture bring a totally new dimension to any simple salad making it look more colourful and exciting.

It is a great accompaniment to any grilled meat or chicken, especially burgers.  Barbecuing your proteins and vegetables at the same time is also a great time-saver and therefore, ideal for a mid-week quick dinner fix.

So let's get cooking.

To feed 4 people you need:
4 cobs corn, husks and leaves removed
2-3 tbs olive oil
1 tbsp sweet paprika
4 pieces of foil about 15cm in length
Salt and freshly ground black pepper

Method: If you are in a great rush, you can cut the cobs in half to speed up the cooking process.  I also find that the small pieces are much easier for handling.  Cut four pieces of foil, each to accommodate 2 pieces of corn.  Place the cob pieces, or two halves, in the centre of the foil, splash with olive oil, sprinkle with paprika, salt and pepper and rub the seasoning all over the corn, seal the foil on all sides into parcels, repeat for the remaining pieces.  

Pre-heat the BBQ to 180C and arrange the parcels on the griddle.  To make sure that the corn is cooked evenly, turn the parcel around every 5 to 7 minutes depending on the size of the cob until the kernels have browned but not burnt.  It may take you between 15 to 20 minutes to cook the corn, so if you are barbecuing any meat too, add it to the grill later.

Once the corn is cooked, remove it from the grill and bring to the table.  Let everyone unravel his own parcel but be careful that it is quite hot.

Grilled corn is quite tasty on its own but I love to serve it with garlic aioli on the side.  Aioli is a lovely and pungent type of mayonnaise that is used to enhance the dish to give it a real kick.


There are as many versions and names for this condiment as there are chefs and cooks, however here is my take on garlic aioli.  It is quite easy to make, I personally love Jamie OIiver's recipe and follow it when I have time.

Mine, however, is a short-cut version where I use commercially made mayonnaise but it tastes good nevertheless.  

You need:
2 tbs Whole Egg mayonnaise
1 tbs fat free yogurt 
1 tbs cold water (if needed)
1 clove garlic finely grated
Salt and freshly cracked black pepper
A pinch of cayenne paper or chili flakes (for the heat lovers)

Combine all the ingredients in a small bowl, if the mixture looks too thick, add a splash of cold water but make sure it is not runny, place in a small bawl and serve alongside the corn.


Sunday, 29 May 2016

WHERE I ATE - BISTROT BIZERKA, CAPE TOWN SOUTH

Ever since my husband and I had dinner in Bizerca a few years ago, it is one of the top French restaurants in Cape Town, we have returned to it every time we are in town, which takes place once a year when we come to visit my in-laws.  This year was no exception. We invited a few of my husband’s old university colleagues and although they live in Cape Town permanently, none of them had been to this restaurant before. 
Bistrot Bizerca
I’ve witnessed this phenomenon on several occasions. A friend of ours who lives in Hong Kong, came to visit Sydney and was telling us about sites and places we never seen or heard of before.  And when the roles are reversed and we become the visitors, we amaze ours hosts with the stories of our discoveries about their city.  It seems that tourists are keener to know about your hometown than the residents themselves.
But back to Bizerca.  The history behind this award winning French bistro has an interesting twist.  Its owners, a husband and wife, used to run a very successful restaurant in Sydney, of all places, until in 2007, the couple decided to return to Cape Town where Cyrilla was born.
On previous occasions we happened to be seated outdoors in the brick-paved backyard but for the eight of us, they sat us at a table inside.  Contrary to the laid-back décor of the backyard, the indoor space looks very moody, its ambience highlighted by the stark contrast of black colour walls, white furniture with a pop of red table accessories.   Oversized chandeliers hung above the tables, casting a soft glow over diners.
Bistrot Bizerca
The standard menu at Bizerca is authentic French classic fare, however, in true bistro fashion, charcoal boards scattered around the perimeter of the restaurant contain the daily specials. The fresh produce is delivered daily and sourced locally.  On this particular night, my eye fell on a dish that was called "Celebration of a beetroot" - a skillfully executed medley of beetroot sorbet, beetroot mousse, beetroot jelly and pickled baby beetroot garnished with fresh micro herbs. 
Bistrot Bizerca
For my main course I chose  a pan-seared venison with mango and cucumber salsa with herb emulsion.  The meat was cooked to perfection, tender and juicy with a slight hint of game flavour.  
As for for my dessert, I chose Crepes Suzette, an old time classic.  Traditionally, the crepes are served flat or folded on a plate.  At Bizerca, however, they serve it in a shape of a parcel filled with tied up by a thinly sliced orange peel and filled with hot boozy and delicious sauce and secured with a thinly sliced orange peel tied up in the knot and once you untie it, the sauce would ooze in to the plate releasing its enticing aromas for you to enjoy.
Bistrot Bizerca
Each dish was prepared with the utmost attention to detail, the presentation was superb, the taste sublime, the company was lovely and we had an absolutely marvelous evening.
So, next time you are planning to visit this lovely city, make sure that you reserve a place at Bizerca.  


And may I suggest, book it well in advance.

Saturday, 20 February 2016

GRILLED FIGS + BLUE CHEESE WRAPPED IN BASTURMA

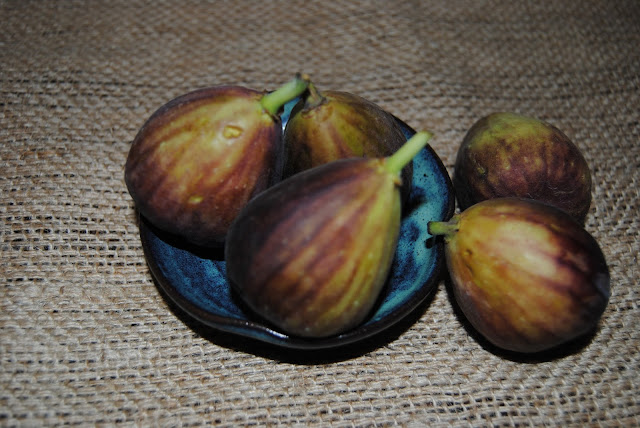
Summer is a perfect time to eat this luxurious and sensual fruit.  Apart from their delicious taste, figs are so versatile and could be eaten as a fruit or as a savoury item.  As much as I enjoy eating them as they are, I also like to impress my guests by serving them as an entrée.

GRILLED FIGS + BLUE CHEESE WRAPPED IN BASTURMA

The combination of the piquant taste of cheese combined with the sweet aroma of figs, further highlighted by the spiciness of basturma (a highly seasoned air-dried beef, traditionally attributed to the Turkish cuisine), delivers an absolutely divine taste to the final dish. 

Each of these ingredients is unique in its flavour and does not require long and heavy cooking to develop the flavours, which is what I like about this recipe.

To serve it to 4 people you need:
8 ripe figs
100 gr of blue cheese crumbled
8 thinly sliced pieces of basturma (available at a deli shop)
6 tbsp balsamic vinegar
2 tbsp olive oil
A bunch of rocket or watercress leaves for garnish

Method:
Pre-heat the oven to 160C and set it up for grilling.

GRILLED FIGS + BLUE CHEESE WRAPPED IN BASTURMA

Place the figs on a cutting board and gently slice cross-ways half way down the fruit, press lightly with your finger to open the figs up and gently push a few pieces of blue cheese into the opening.

GRILLED FIGS + BLUE CHEESE WRAPPED IN BASTURMA

Wrap a piece of basturma around each fig and secure with a tooth pick.  If the slices are not long enough, you can cut each piece of basturma in half lengthwise, wrap the basturma around the fig and then secure the slices of basturma with a tooth pick.
 GRILLED FIGS + BLUE CHEESE WRAPPED IN BASTURMA

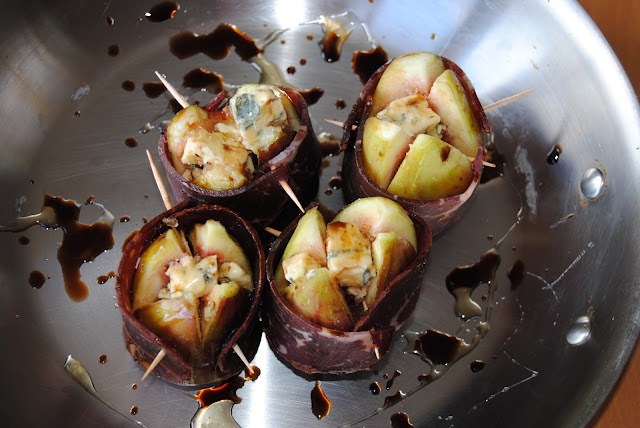
Add olive oil to the pan and then place the figs into the pan in an upright position.  If they tend to fall onto their side, scrunch a small piece of foil to make a stand for the fig.  Splash balsamic vinegar over the figs and pour the remaining balsamic vinegar into the pan and place under the grill for about 10 minutes or until the cheese has melted.
 GRILLED FIGS + BLUE CHEESE WRAPPED IN BASTURMA

Remove from the oven, scatter some rocket or watercress leaves over the plate and sprinkle with extra virgin olive oil, place two figs on top of the rocket or watercress and drizzle the pan juices over the figs and around the plate like a real pro.

GRILLED FIGS + BLUE CHEESE WRAPPED IN BASTURMA

Enjoy!!!


Monday, 8 February 2016

CHICKEN "TABAKA" WITH WATERMELON AND BASIL SALSA

Traditionally, this dish has been tied up with Georgian cuisine, however, where we used to live (Odessa, Ukraine) this dish was on the menu of almost every eating establishment, large or small.

We most probably didn’t have all those aromatic spices that were growing on the slopes of the Georgian mountains, however we got the gist of it, i.e. the chicken needs to be pan-fried under heavy weight for the bird to be cooked through and also to achieve the maximum crispiness of the skin.
CHICKEN "TABAKA" WITH WATERMELON AND BASIL SALSA
You might have heard about a recipe called “Chicken under the brick” which is an English interpretation of this quite unusual name, since “Tabaka” and tobacco has the same root.

However, the name is not that important since the final result is delicious juicy meat covered in crispy finger leaking skin.

Here is how I do it
You need:
1.5 kg free range corn fed chicken
Baking or sandwich paper
1 brick wrapped in foil
2 tbsp olive oil for frying
1 lime quartered to serve
1 tsp of fennel seeds, lightly toasted and crushed
1 tsp of smoked paprika

For the marinade:
3 tbsp olive oil
5 tbs soy sauce
3 tbsp fish sauce
5 garlic gloves peeled and crushed
3-5 kaffir lime leaves
Juice of half a lime
1 small red chili, lightly chopped, seeds removed
2 tsp coriander seeds, lightly fried and crushed

Method:
In order to get the maximum crispiness of the skin, you need first to spatchcock the chicken, in other words remove the backbone.  It might sound a bit scary but it’s quite easy thing to do. 

Place the bird breast on a chopping board breast side down. Using a sharp knife or kitchen scissors, starting at the neck, run it all along the bone on both sides all the way down.  Discard the bone. Flip the chicken over and place the palm of your hand firmly over the breastbone until you hear a crack, which is exactly what you need. The chicken is now flat and ready for the next step.  Rinse the cavity under cold water and pat dry.

Prepare the marinade by combining all of the ingredients in a big enough bowl to accommodate the chicken and check for seasoning.  It is quite important that the marinade has strong taste as it needs to penetrate the meat but by all means adjust it to your liking.  Submerge the bird in the marinade and place in the fridge overnight.  In the morning, turn the bird over to get it marinated evenly.

Remove the chicken from the fridge about half an hour before cooking.  Take it out of the marinade, pat dry, rub with olive oil, paprika and fennel seeds.

CHICKEN "TABAKA" WITH WATERMELON AND BASIL SALSA

Pre-heat the pan on medium-high heat and add olive oil.  Once hot, gently lower the chicken skin side down, into the pan, tear off a piece of baking paper to loosely cover the pan so as to avoid splattering, cover it with a big flat plate or lid and place a brick wrapped in foil on top of it.  Cook the chicken on high heat for about 10 minutes, then drop the temperature to medium- low and continue cooking for about 20 minutes.

CHICKEN "TABAKA" WITH WATERMELON AND BASIL SALSA

Then remove the brick, plate and the paper and gently turn the chicken over.  Continue cooking on low heat for another 20 minutes, then insert a skewer into the thickest part of the leg and if the juices come out clean, remove the chicken from the pan, cover loosely with foil and rest in warm place for about 10 minutes.  I find that the microwave oven is a perfect place for the job.

CHICKEN "TABAKA" WITH WATERMELON AND BASIL SALSA
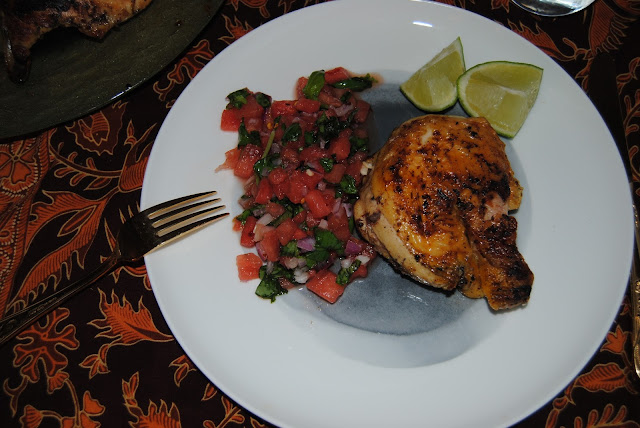
Arrange the chicken on a serving platter and bring to the table for everyone to see.  Slice at the table and serve with some lime wedges and Watermelon and Basil Salsa on the side.
CHICKEN "TABAKA" WITH WATERMELON AND BASIL SALSA


Enjoy!!!


WATERMELON AND BASIL SALSA

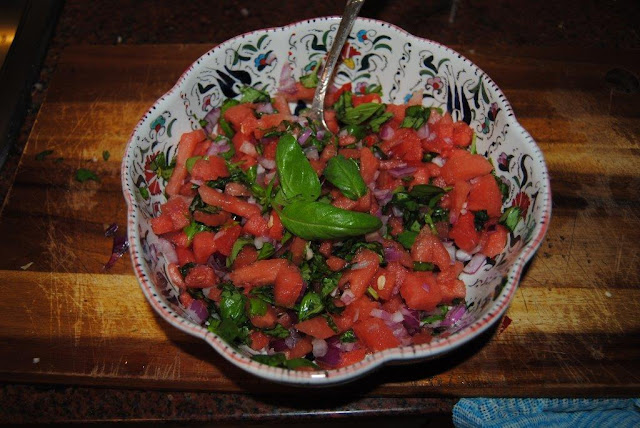
Sweet, savoury and crunchy this watermelon salsa is a perfect accompaniment to any grilled meat or chicken. 

Watermelon + basil salsa
It reminds me of a hot Sydney summer and I love to eat it chilled.  I think it goes especially well with my Chicken Tabaka, the sweetness and crunchiness of the watermelon enhances the crispiness of the chicken skin and the aroma of basil highlights the flavours of the meat.

To make a salsa you need:
600 gm watermelon flesh
Half a cup of tightly packed basil leaves
½ of a red chili, seeds removed
1 small red onion finely chopped
2 tbsp extra virgin olive oil
Salt and freshly cracked black pepper

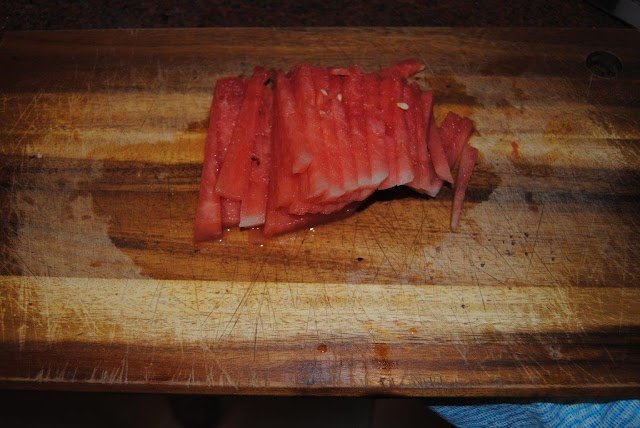
Cut the watermelon into pieces of similar thickness and then slice them into thin long strips.  Holding it all together, turn the whole lot around by 90 degrees and again slice into thin strips.  You will end up with a very evenly, finely sliced little cubes of watermelon which is what salsa is all about.  
Watermelon + basil salsa

Watermelon + basil salsa

Watermelon + basil salsa
Add finely chopped red onion, chilies and torn basil leaves, pour in the extra virgin olive oil and season with salt and pepper.  Mix the salsa gently and give it a taste.  The saltiness should be in perfect balance with the sweetness, you should also taste some salt and the aroma of the basil leaves.  Adjust the seasoning to your liking and serve as an accompaniment to “Chicken Tabaka” or other grilled meat.

Enjoy!!!


Friday, 22 January 2016

PAN - ROASTED VINE BABY TOMATOES WITH PINE NUTS

In of the SundayLife magazine's publications Adam Liaw (an Australian lawyer and a celebrity chef) shared with us a couple of summer recipes which his family loves to eat around this time of the year.  He also made an interesting comment on how the Asian cuisines are all about seasonal eating, quoting the Japanese saying “All good food has its time” and I couldn’t agree more.  When I was living in Russia 22 years ago, we didn’t have the luxury of fresh fruit and vegetables supplied to us every day of the year, we ate what was in season and enjoyed full flavours developed naturally due to their natural cycle of life.

PAN - ROASTED VINE BABY TOMATOES WITH PINE NUTS

And that’s why at this time of the year (Australian summer) that I thoroughly enjoy the taste and the variety of tomatoes, especially baby tomatoes on the wine, for their aroma, sweetness and juiciness which make them taste great in salads, roasted or pan-fried.

As much as I enjoy them in my summer salads, they become an excellent side dish to accompany your roast lamb or a beef dish.

My favourite way of wine baby tomatoes is just pan-fried them with a handful of pine nuts and a splash of balsamic vinegar to enhance their sweetness and caramelisation.

Here is how I do it.

You need:
One or two branches of vine baby tomatoes
2 tbsp pine nuts
2 tbsp olive oil
1 tbsp of balsamic vinegar
VINE BABY TOMATOES

Method:
Place a pan on the stove over medium-high heat and add olive oil.  Once the oil is hot, add the tomatoes, throw in pine nuts and season with salt and pepper.  Roast tomatoes for about 5 minutes, then give the pan a good shake and continue cooking until the skin on the tomatoes collapses into "wrinkles".  

Splash balsamic vinegar, give another shake and serve alongside your main course.

Enjoy!!!


Sunday, 22 November 2015

BBQ SALMON KEBABS

When it comes to choose a method of cooking fish for, I prefer mine cooked on a barbecue. Not only it is a much healthier option, but it also eliminates the fish smell that normally lingers around your home for quite a while after the dinner has been consumed.
BBQ SALMON KEBABS

Having a South African husband whose love affair with the “braai” (SA term for BBQ) is a national pastime also contributes to what I describe “choosing your weapon”.  We cook our meals on a BBQ pretty much all year round, however in summer, it becomes a blessing not having to slave over the stove in the 35 degree heat.

The following recipe is one of the quickest and easiest way of cooking any fish.  Also, you've got this charred stripes on the flash that are super delicious and flavoursome.

This method of cooking is ideal for a mid-week quick dinner fix or a weekend lunch.

To feed 4 people you need:
4 salmon skinless fillets (approx 150-200 gr each)
Salt and freshly ground black pepper
3 tbsp olive oil
1 lemon cut into wedges to serve

Method:
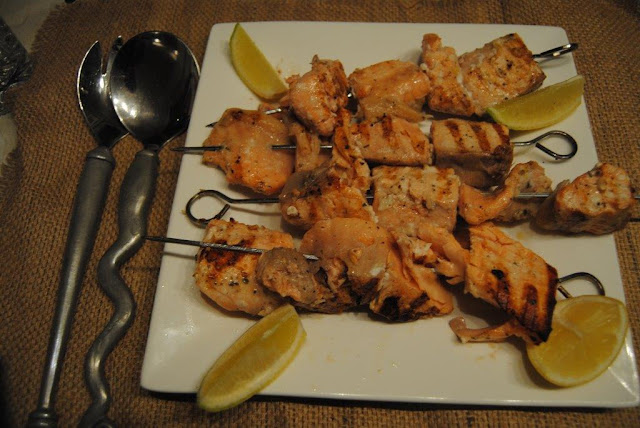
Cut about 3cm wide slices across each fillet and place in a bowl.  Season with salt and pepper and pour over olive oil.  You don’t need much olive oil because salmon is quite an oily fish.

Pre-heat your BBQ to 180C, thread four pieces of fish on each skewer and place them on top of the grill.  Cook for about 3-4 minutes on one side, then turn the skewers over and cook on the other side.
 
Remove onto the serving plate, arrange the sliced lemon wedges around the fish and serve.

Enjoy!!!

BBQ SALMON KEBABS